Overview
With little Wwise and virtually no Unreal experience, I found myself in charge of audio implementation for a project that was a year into development. This is a collection of the information I wish I could have found online when I started. It covers how to generate soundbanks in Wwise and Unreal, the options in regards to playing sounds in-engine (and why we choose one option over the other), and how to set Wwise parameters and states.
The game being used in this example is an academic project, Takowana County, for which I did audio implementation. The corresponding Wwise project created by the audio team is the subject of any Wwise-related screenshots.
This guide assumes you have both a Wwise project and an Unreal project available for use, but not much experience with Wwise or Unreal. You will also need the Wwise plugin for Unreal installed. Some of the described bugs are caused by read/write file access issues due to Perforce, which you can disregard if you aren’t using version control (but please, use version control.)
Wwise 2018 and Unreal 4.20 were used for this project.
Generating Soundbanks in Wwise
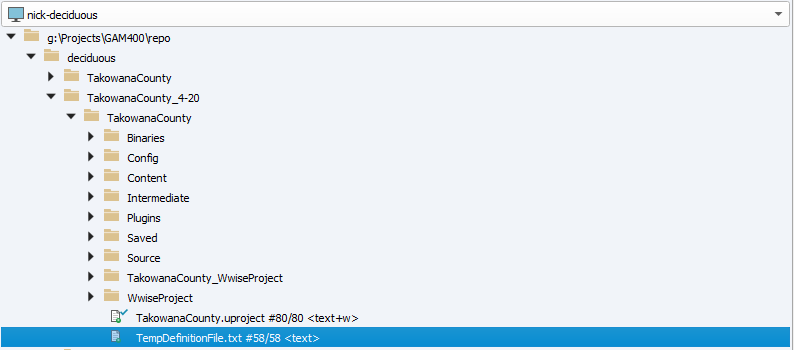
After opening up the Wwise project, navigate to the Designer layout scheme via Layouts > Designer on the menu bar. You should see the Project Explorer window (shown below) - if not, try finding it in View > Project Explorer.

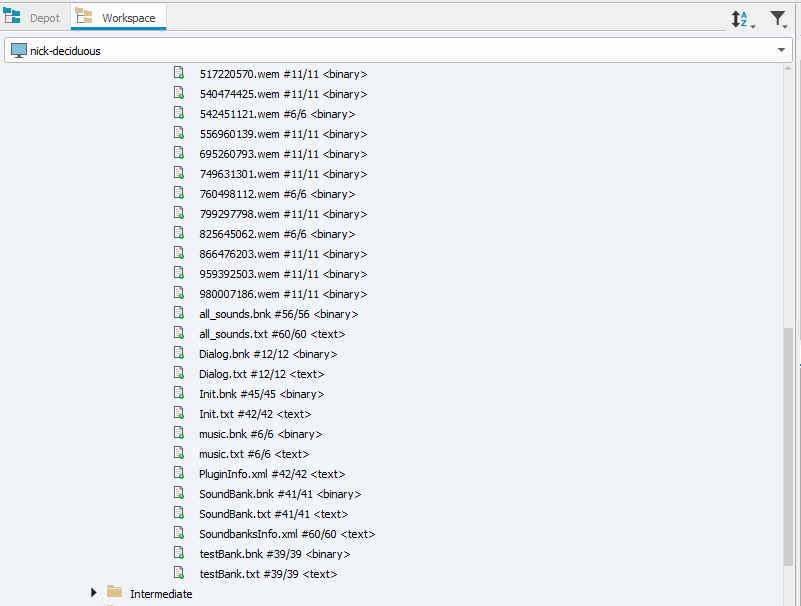
To generate soundbanks, right click on your soundbank(s) in the list, and select “Generate Soundbank(s) for current platform”.

While the soundbanks are generating, you’ll see the following window. Looks like we’ve got some errors!
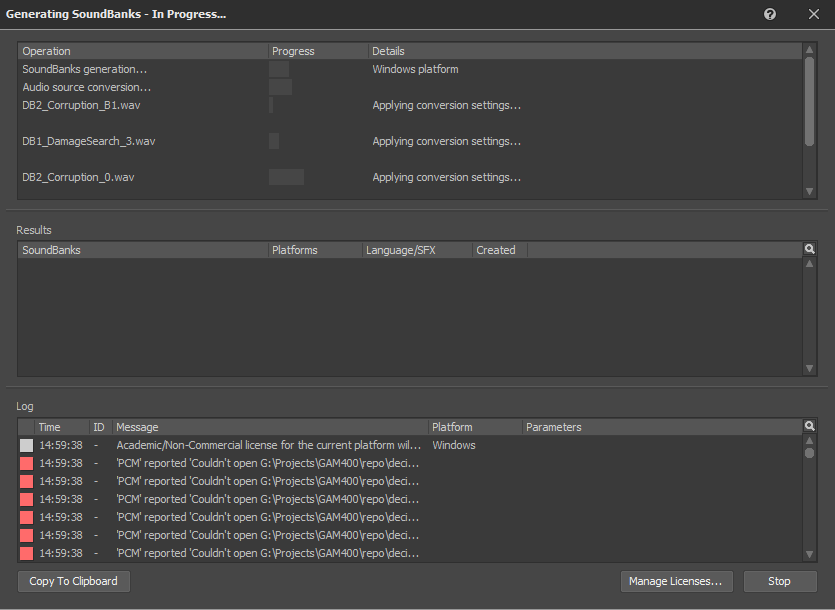
Let’s investigate further.
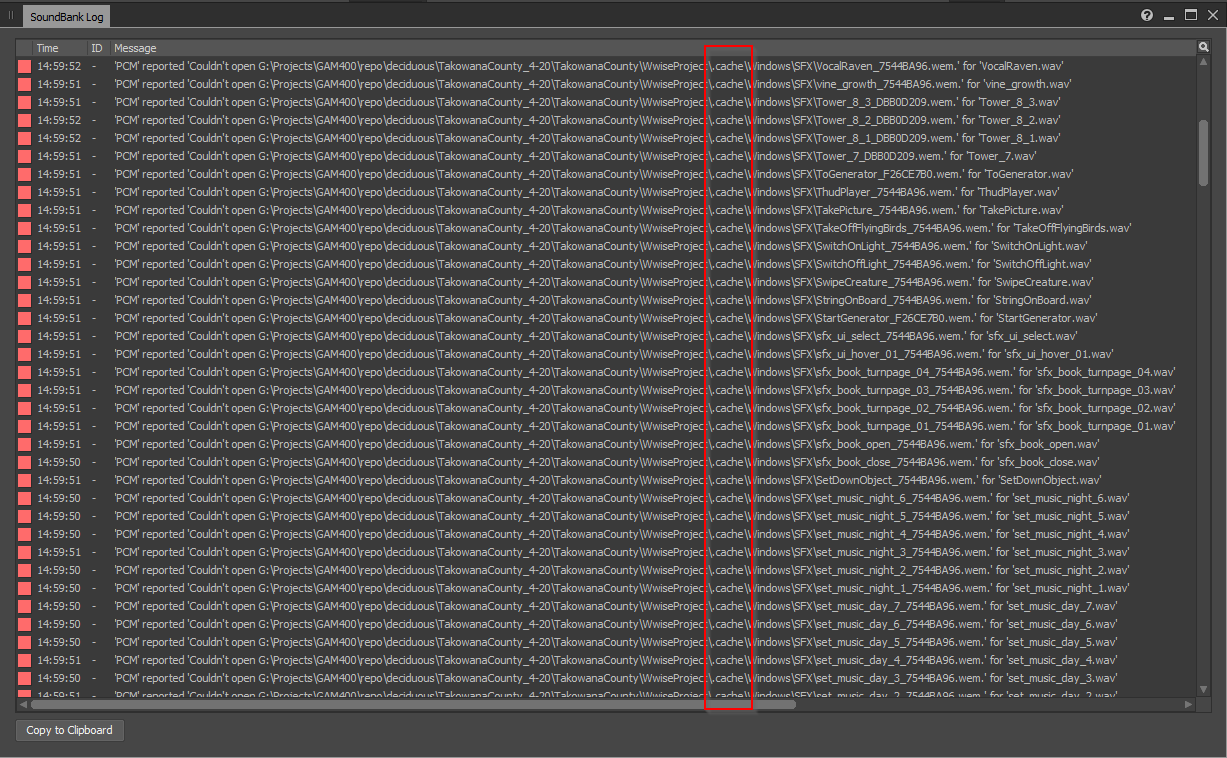

The error (being unable to open the file) is caused in this case by being unable to open the files with write permission because we haven’t checked them out in Perforce. An indication of this is that all the files in question are in the hidden .cache folder of our Wwise project.
To be safe, we’ll check out the entire Wwise project folder and try generating the soundbank again. If successful, the Soundbank Log should contain no errors.
Generating Soundbanks in Unreal
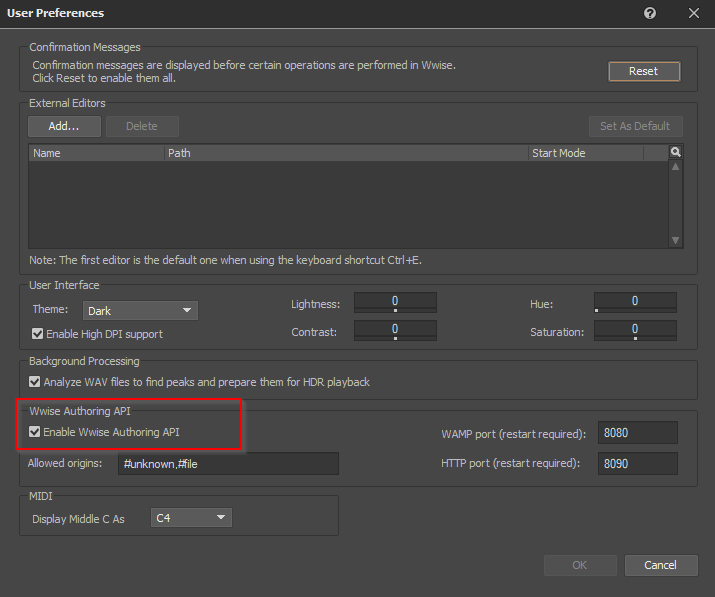
Before opening Unreal, we want to make sure it understands how to generate its representation of the soundbanks. To do this, Wwise needs to be open to communication, so we need to make sure the option “Enable Wwise Authoring API” is enabled in our User Preferences in Wwise. More information on the Wwise Authoring API can be found here.
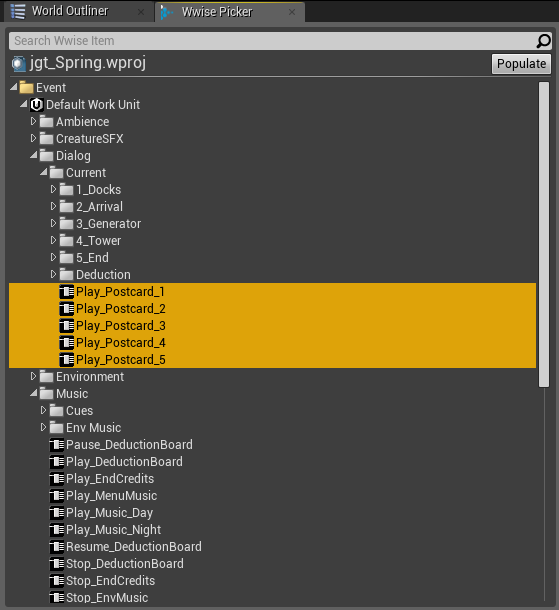
Next, we need some actual sound events to go into our soundbanks. Let’s open up the Wwise API Picker window in Unreal, then drag-and-drop some of our Wwise events into the Content Browser.

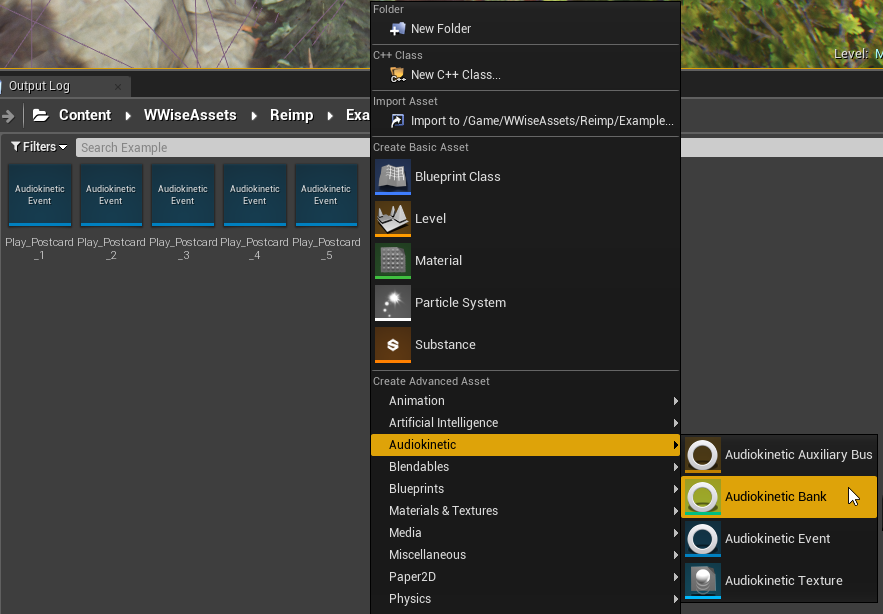
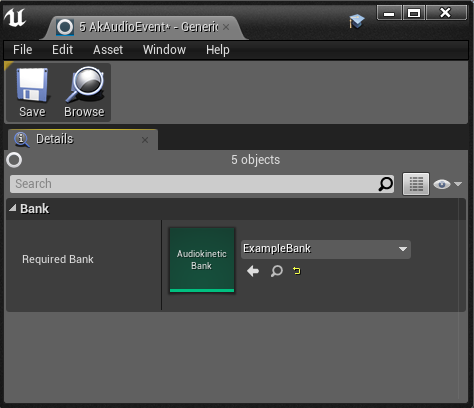
We also need to create a soundbank to hold our imported sounds. Right-click in the Content Browser and navigate to the Audiokinetic submenu, then create an Audiokinetic Bank.
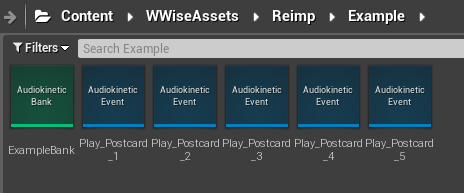
There it is! In this case, I’ve named it “Example Bank”.
Our events need to know which soundbank they belong to - let’s highlight all of our newly created events, right-click to bring up the context menu, then click Edit.
In the dropdown menu, select your new Audiokinetic Bank asset, then save.
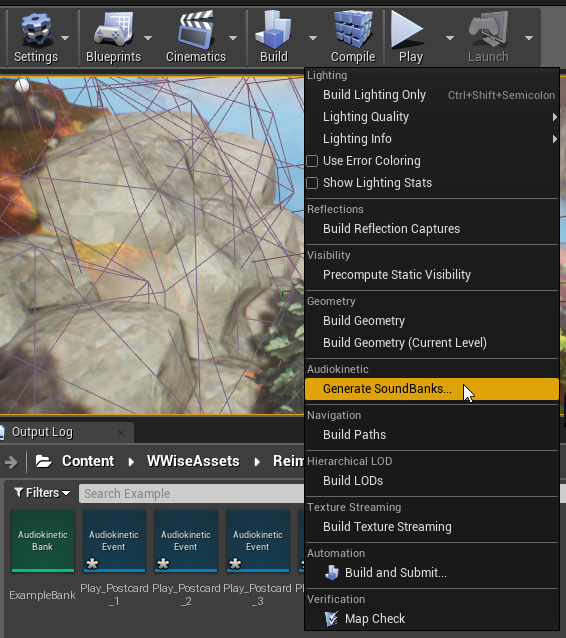
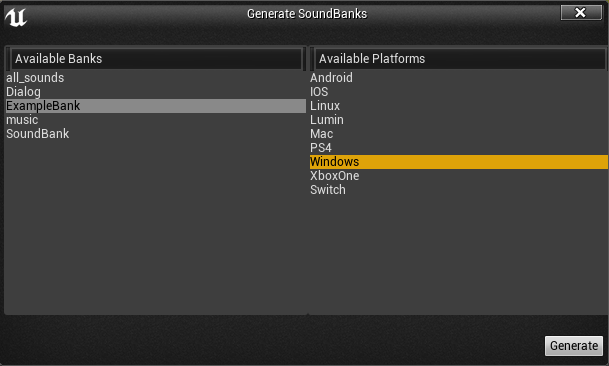
At this point, we should be ready to generate our soundbanks. Under the Build tab, select Generate Soundbanks. In the pop-up window, select your soundbank and platform, then click Generate.
Oh no, it failed!
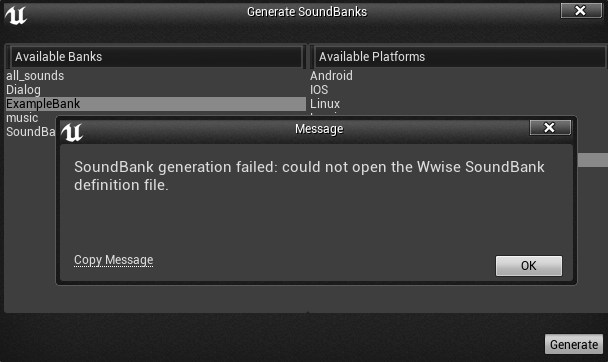
Turns out we forgot to check out a very special, very irritating file from our Perforce repository. It’s called TempDefinitionFile.txt, and it keeps track of which events belong to which soundbanks (the file is in plain text format, you can open it in a text editor and read it if you’re inclined).
We also forgot to check out the folder where Unreal puts our generated soundbanks - in my project, it’s a folder called “WwiseAudio” (in all honesty, this folder existed before I joined the team and I don’t know how it got there). It should have files named similarly to your soundbanks. Check out the entire folder from your repository, then try generating the soundbanks in Unreal again.
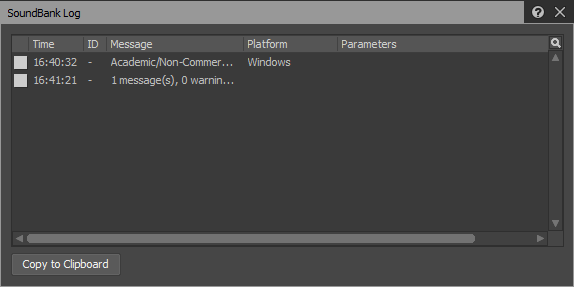
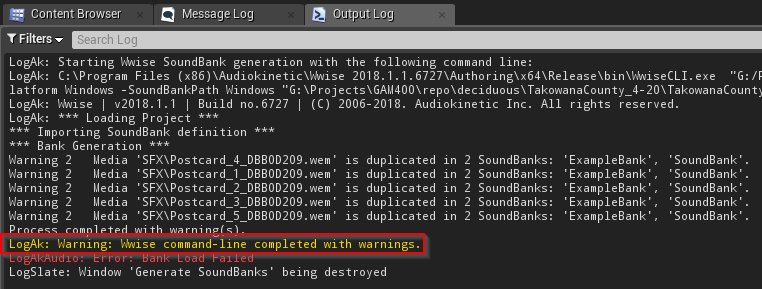 Look at that! We’ve got soundbanks now! We have some warnings (mine are occurring because I’ve imported events for the purpose of this example that being used elsewhere in the project), but as long as we get the message “LogAk: Warning: Wwise command-line completed with warnings”, then the soundbanks have been generated.
Playing Sounds
All our soundbanks have (hopefully) been generated and it’s time to play some sounds! We do this by “posting” events from an actor, which means we are using that actor’s sound emitter to play our sound. It’s important to note that even if a sound isn’t positional, it still needs an actor’s emitter to be played.
Here are the three blueprint nodes for posting events: Post Event, Post Event at Location, and Post and Wait for End of Event.
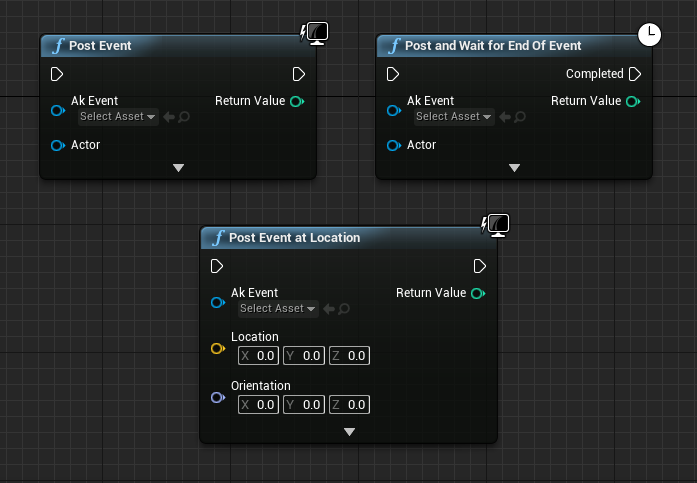
Post Event is the simplest node - it plays a sound at the location of the actor. This means that if the actor’s pivot point is not at an ideal location for playing sound (e.g. the feet of a character) then you might notice strange occlusion or attenuation.
You might have noticed that Post Event at Location doesn’t have an input slot for an actor - that’s because Unreal creates a temporary object at the specified location in order to play the sound. This makes it possible to play sound events at positions chosen dynamically. It also presents a solution to our “less-than-ideal pivot point” problem; we can get the actor’s location, offset it (for example, add the height of the character to adjust the position from the feet to the head), then call Post Event at Location.
Our third option is Post and Wait for End of Event. It’s similar to Post Event, but the Completed execution path will be run when Wwise notifies Unreal that all sound events associated with your Wwise event have ended. KEEP IN MIND that this means if your event in Wwise is playing multiple sounds under the hood, then Unreal won’t be notified until ALL of those sounds have finished playing. Also, if your audio buses are utilizing instance limiting and the sound gets cut off prematurely, Unreal will NOT be notified that the sound event completed because it never technically finished playing.
Setting Parameters / RTPC’s
Unless you are only doing basic audio implemenation, you will find yourself (or your sound designer) wanting to make use of parameters in Wwise. These are called RTPC’s or Real-Time Parameter Controls. Our blueprint node for this is called Set RTPCValue.

In Wwise, RTPC’s are associated with an event, audio bus, actor-mixer, or other fancy Wwise item. Even if you aren’t creating audio content or porting raw content into the Wwise project, it’s still good to know your way around Wwise. You won’t need to bother your sound designer over minor changes and you won’t be blocked from working if your sound designer isn’t immediately available. The Property Editor is where we edit RTPC’s.
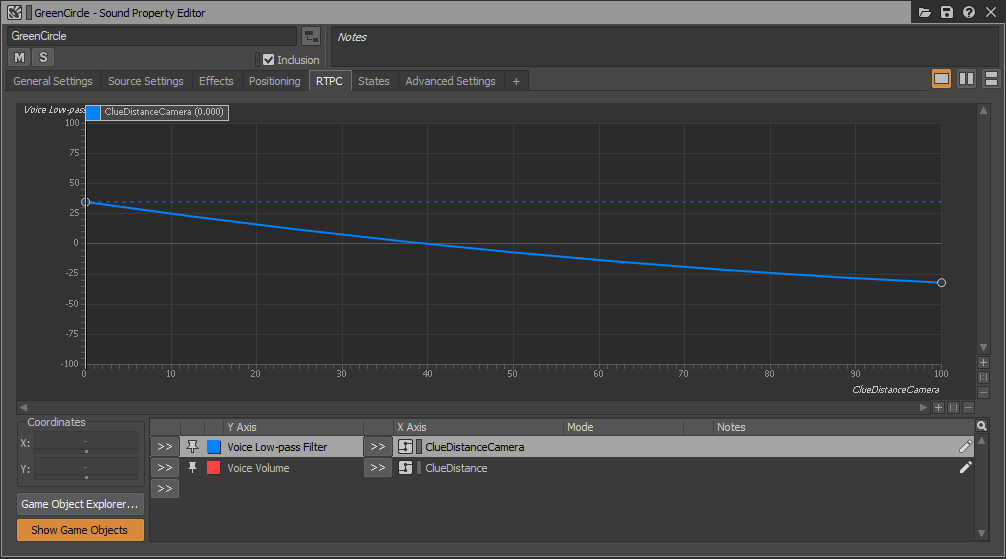
This particular event was for adjusting a low-pass filter based on how directly the player in our game was looking at a clue. A mechanic in the game is to take pictures of clues with a camera and we needed to tell the player when they were capturing the clue well enough.
But let’s say we didn’t want the sound to respond immediately, in case the player decides to violently jerk the camera around. We can specify a time (in milliseconds) to interpolate the change over. In this case, I chose 200ms.
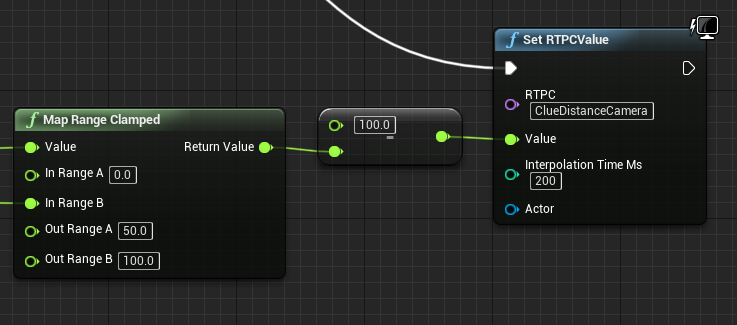
Notice that I didn’t specify an Actor to set the RTPC on - this is because Wwise allows us to set RTPC’s globally, not just per object. It is useful if you don’t know which actor a sound is being played from or if you want to affect multiple sounds being played from different actors. Conversely, setting an RTPC per object is handy if you want two of the same sound events to sound differently.
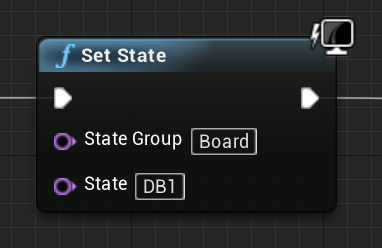
Setting Wwise States
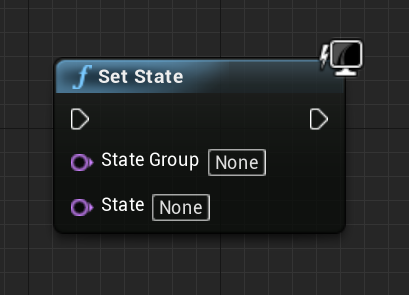
Wwise supports another feature called States. In Unreal, we can set states globally with the Set State blueprint node.
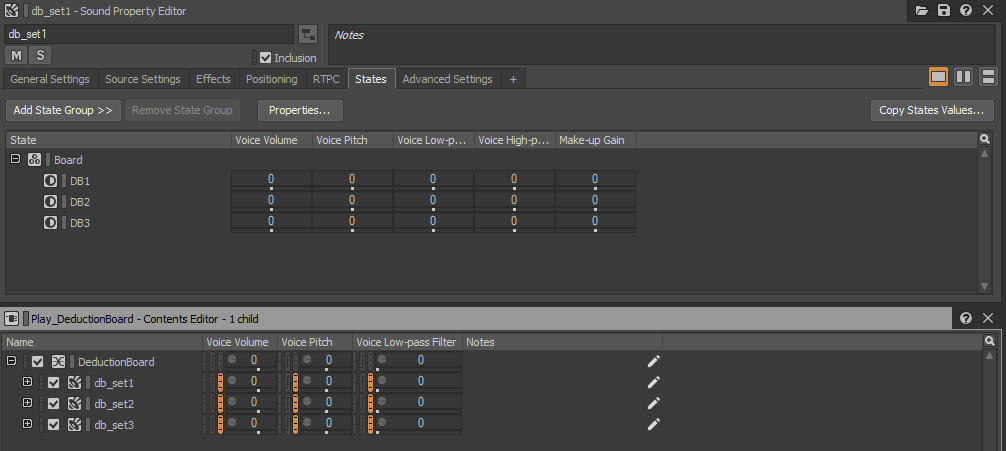
In our project, we used them to adjust certain music events based on game progression. In our Wwise project, there were three states for this piece of music.
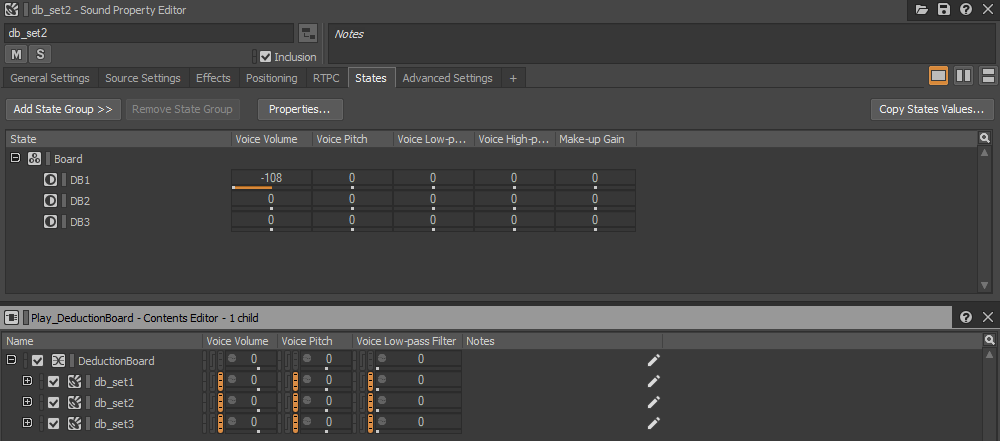
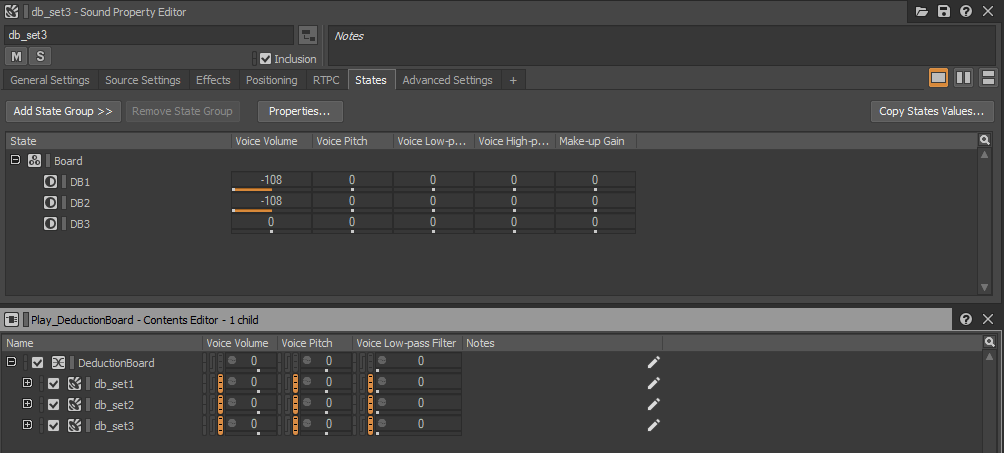
So in our game, we changed the state like this: